If you have seen any of the posts about my reading journal, both past and present, you’ll notice that I love adding the covers of the book into my spreads.
I get a lot of questions about how exactly I do this, so I thought I’d make a post and share with everyone my exact process so that you can do it too!
There are actually two methods that you could use to make these book covers and I’m going to show you both.
The first method is using Google Docs.
The second method is using Canva. (Click here to skip ahead to the Canva demo.)
I also created a free Canva template that you can download and use to make it even easier for you. (Click here to skip ahead to instructions on how to download and use this template.)
I will try to make it as simple and straightforward as possible so you can quickly follow along, while still being detailed enough just in case there’s anyone who might not be tech-savvy or familiar with Google Docs or Canva.
Let’s get started…
Method 1: Google Docs
Step One: Get Cover Images
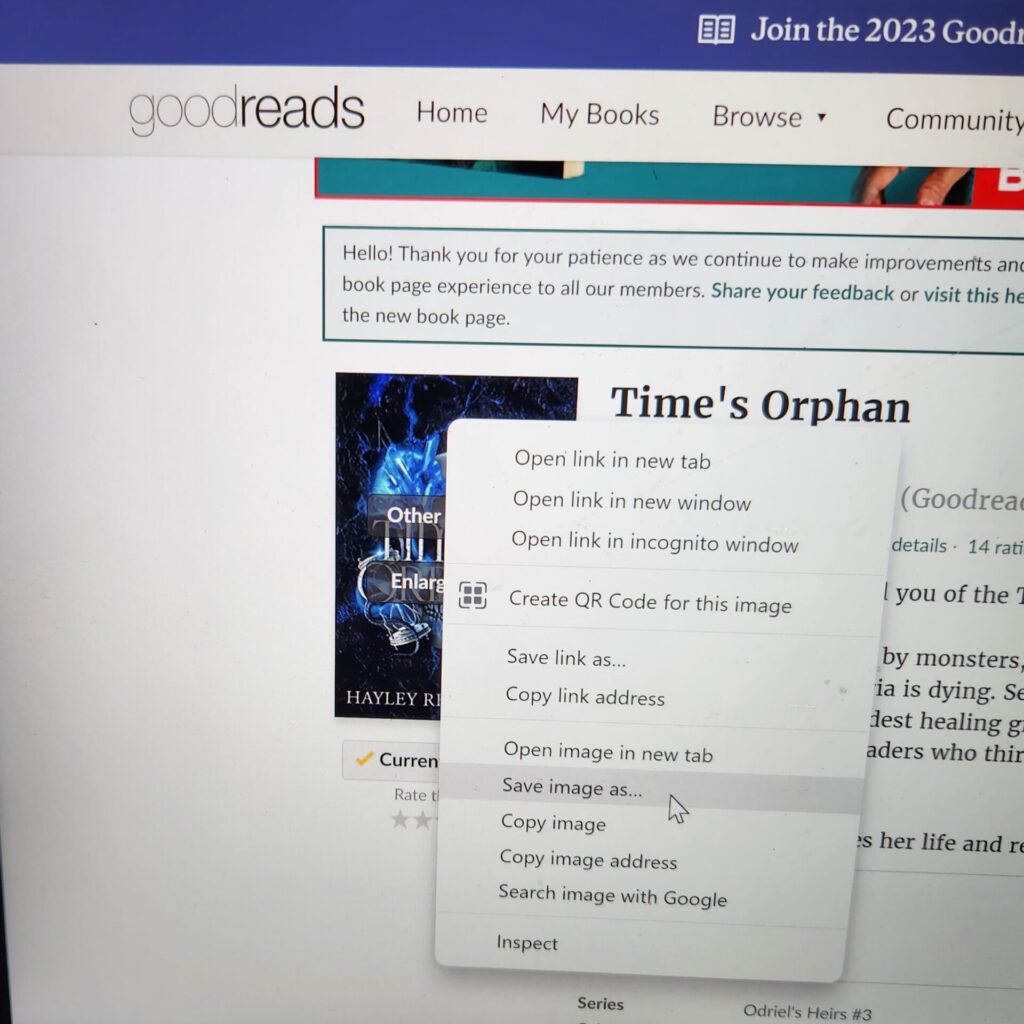
I get the book cover images from Goodreads. Simply right click on the photo and save it to your computer. I keep a special folder just for all of my book covers so that they are easy to find when I need them.
Step Two: Create Google Doc
I like to use Google Docs. I keep a running document labeled “Book Covers” that I can add to over time as I finish reading a book. Then I have it all set to go whenever I’m ready to print. Afterwards, I’ll just delete the photos and start over again in that same document for the next set of covers.
You could use another similar software instead, but I find this one to be the easiest and that’s what I’m going to show you for this process.
Step Three: Add Images to Google Doc
Click on “Insert”, “Image”, and then “Upload from computer”.
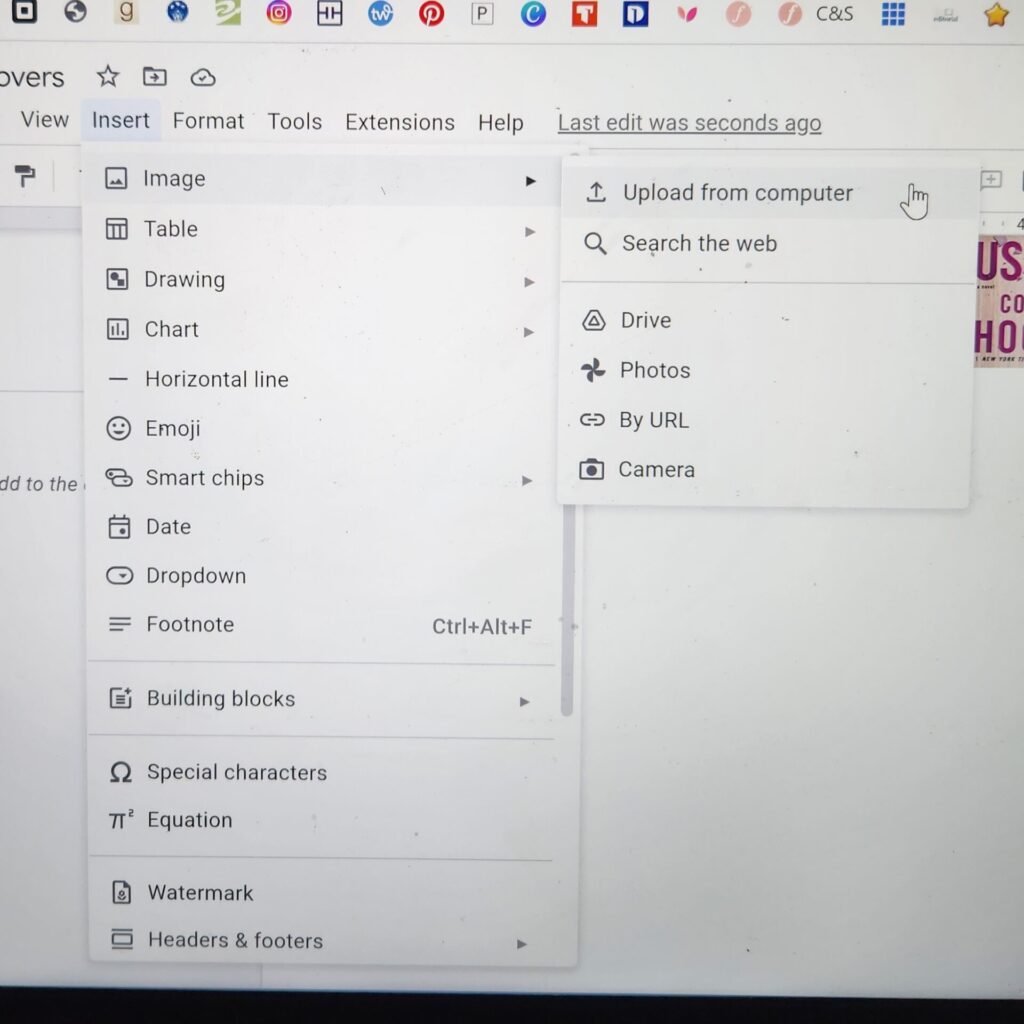
Choose the covers you want from wherever you have them saved on your computer and add them to the document.
Step Four: Resize Images
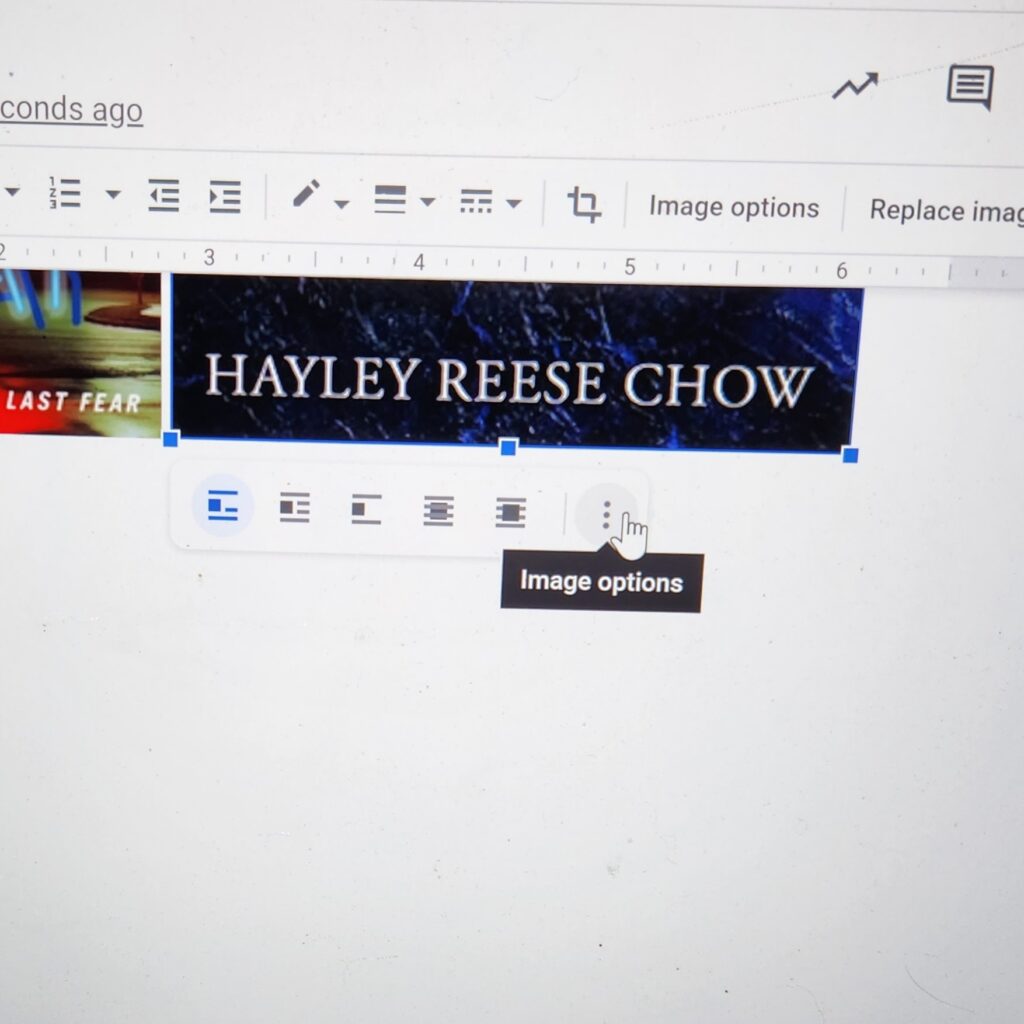
To resize the images in the document, click on the image. Beneath the photo you should see a button with three vertical dots (it says “Image options” when you hover over it), click on that.
Then click on “Size & rotation”.

This will open up a menu to the right of your document.
The only change I make is to the “Width”. Everything else will automatically adjust to whatever you change this to.
In my journal, I use two different sizes of book covers.
For the small covers on my yearly overview bookshelf spread, I change the width to 1.5.
For the medium size covers on my book review pages, I change the width to 2.
The height of the covers may vary slightly. This does not bother me, but you can try adjusting the size more if you want. If you really want the sizes to be perfectly even, trying using the second method with Canva detailed below.
Step Five: Print & Cut
Once you have all your covers resized, you are ready to print.
I use my local library because I do not have a color printer, and they are inexpensive and high quality.
I usually cut the photos out using regular old scissors, but you could also use a paper trimmer if you want to be more precise.
Step Six: Add Them to Your Journal
Then you can add them into your journal.
I use a tape runner. I find this to be the easiest, fastest, and least messy option. Of course there are many ways to tape or paste them in, but I definitely recommend a tape runner. They are fairly inexpensive and can be found on Amazon or at most stores.
If you are using 5mm dot grid for your journal, these are the approximate size that the book covers will be once you’ve printed them out:
- Width 1.5 – 5×7 Squares
- Width 2 – 7×10 Squares
Method 2: Canva
If you are not familiar, Canva is free tool that you can use to make all kinds of graphics and printables with. If you haven’t already, you will need to make an account. It is quick and easy to do and free to use.
Step One: Get Cover Images
I get the book cover images from Goodreads. Simply right click on the photo and save it to your computer. I keep a special folder just for all of my book covers so that they are easy to find when I need them.
Step Two: Create New Document
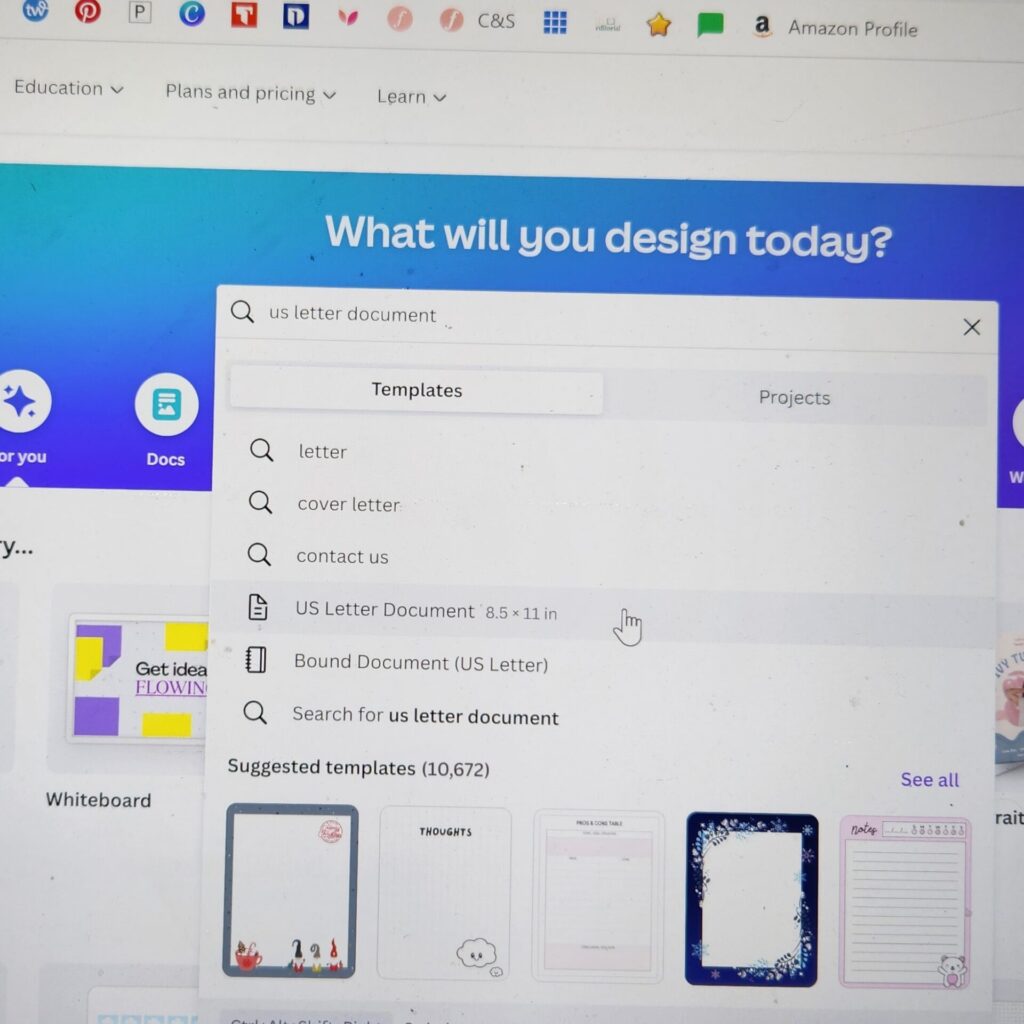
When you are at the Canva homepage, search for “US letter Document” and click on it.
Then click on “Create a blank Document”. This should open up a separate tab with your new blank document.
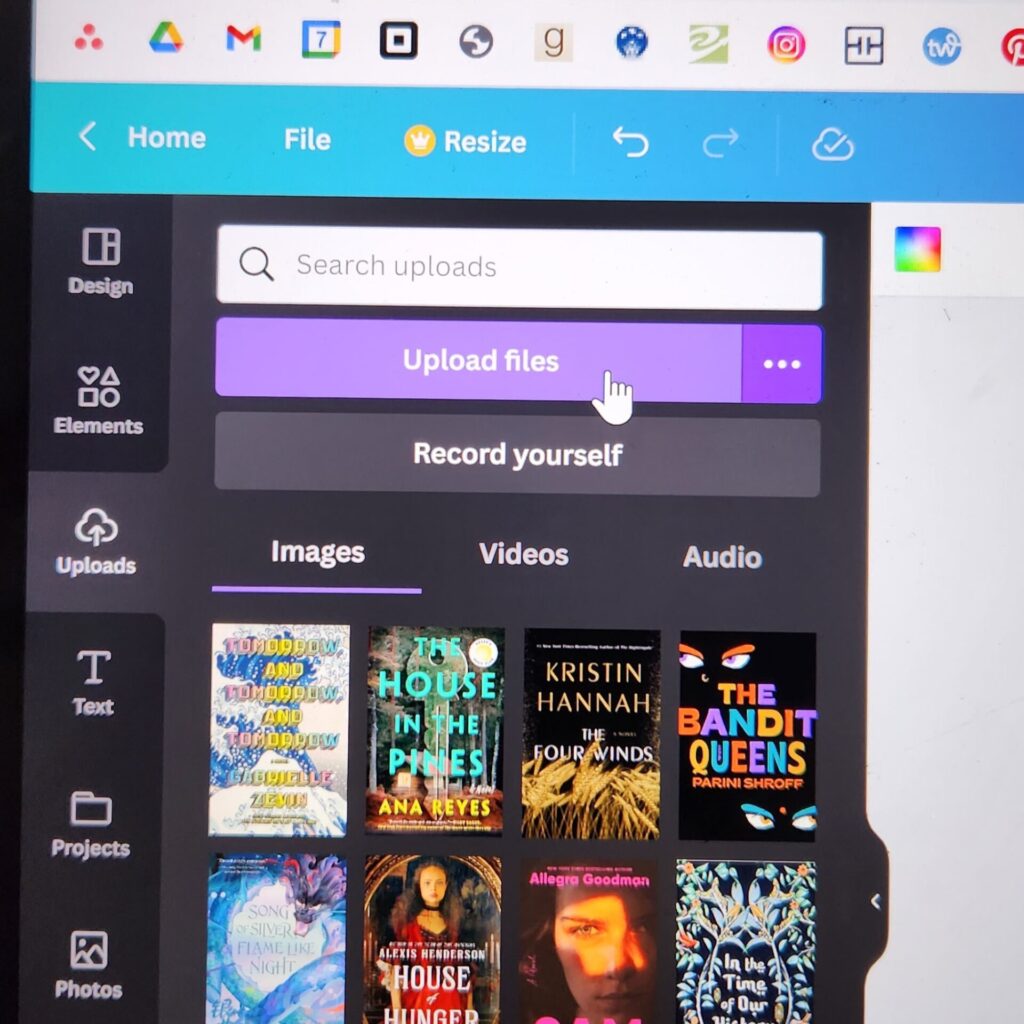
Step Two: Upload Images
On the left side, click on “Uploads” and then “Upload files”. Add all the book covers that you want to print. You can also drag and drop the images into Canva as well.
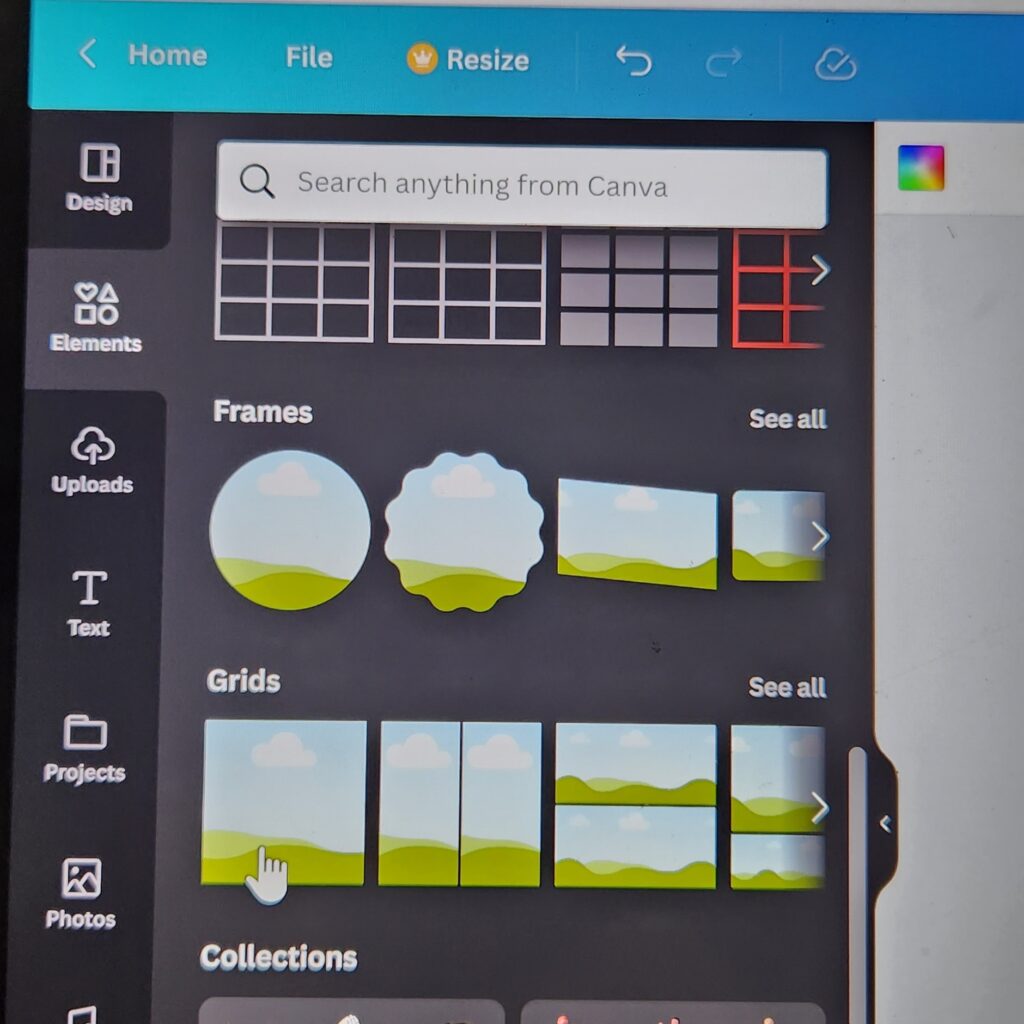
Step Three: Add Image Grid
Next, you are going to go to the “Elements” tab on the the left side. Then scroll down until you see the section labeled “Grids”. Click on the first one (it should be a plain square) and it will be added to your blank document.
Step Four: Resize Grid
Click on the Grid and drag it from the corners to resize it to your preference. While you are resizing it, you will see the dimensions pop up below and to the right of the Grid in a little black box.
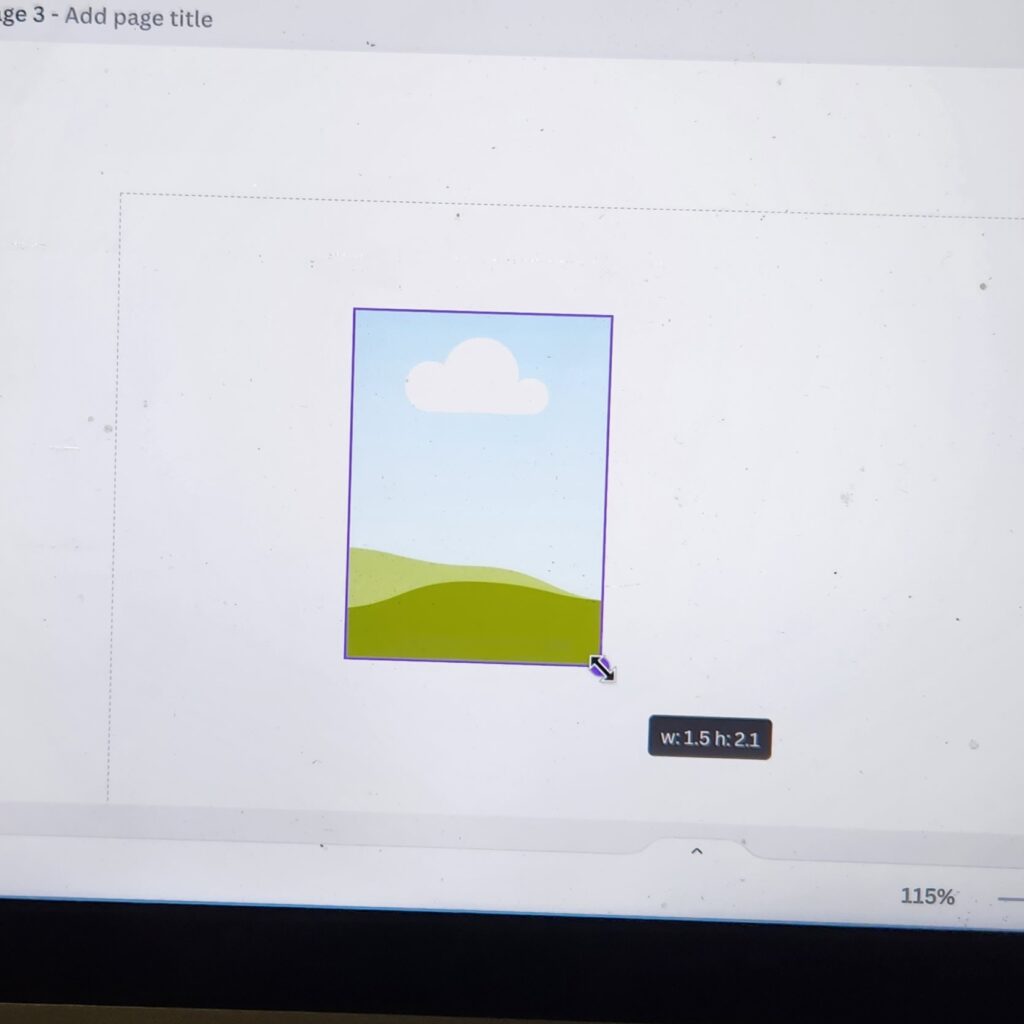
For the small covers on my yearly overview bookshelf spread, I resize the grid to around 1w x 1.5h inches.
For the medium size covers on my book review pages, I resize the grid to around 1.5w x 2h inches.
Step Five: Copy & Paste
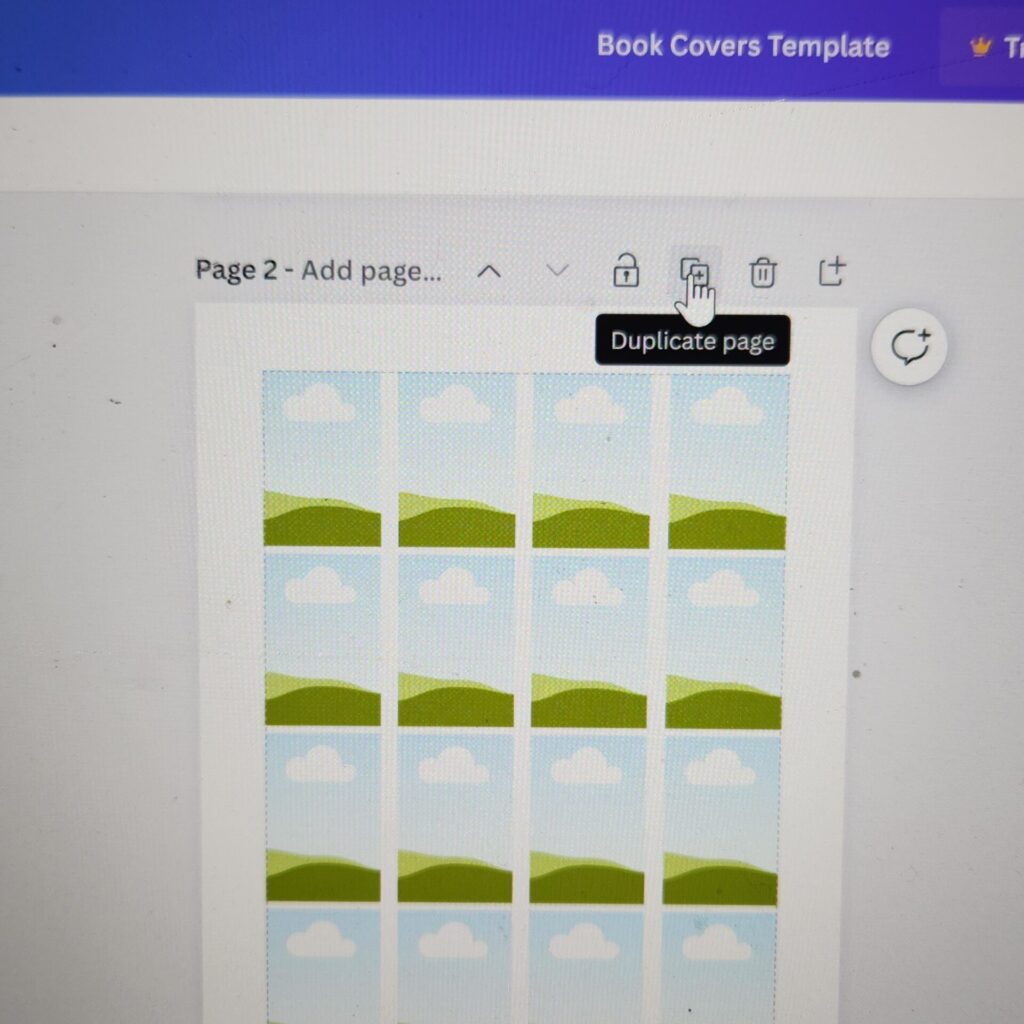
Once you have the Grid the size that you want, copy and paste the Grid to fill up the entire page – or for as many book covers as you want to print.
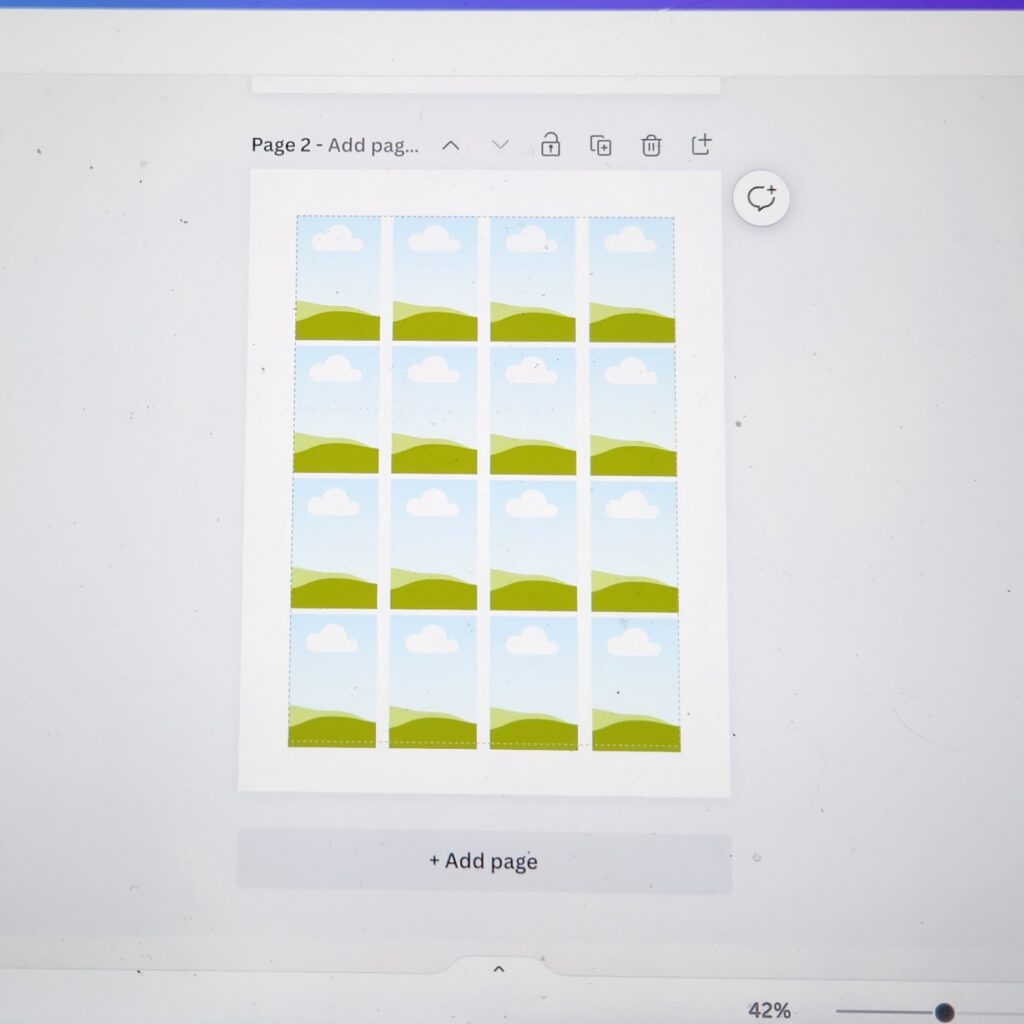
You can add a second page to your document and create multiple pages of covers in multiple sizes. This is what I do.
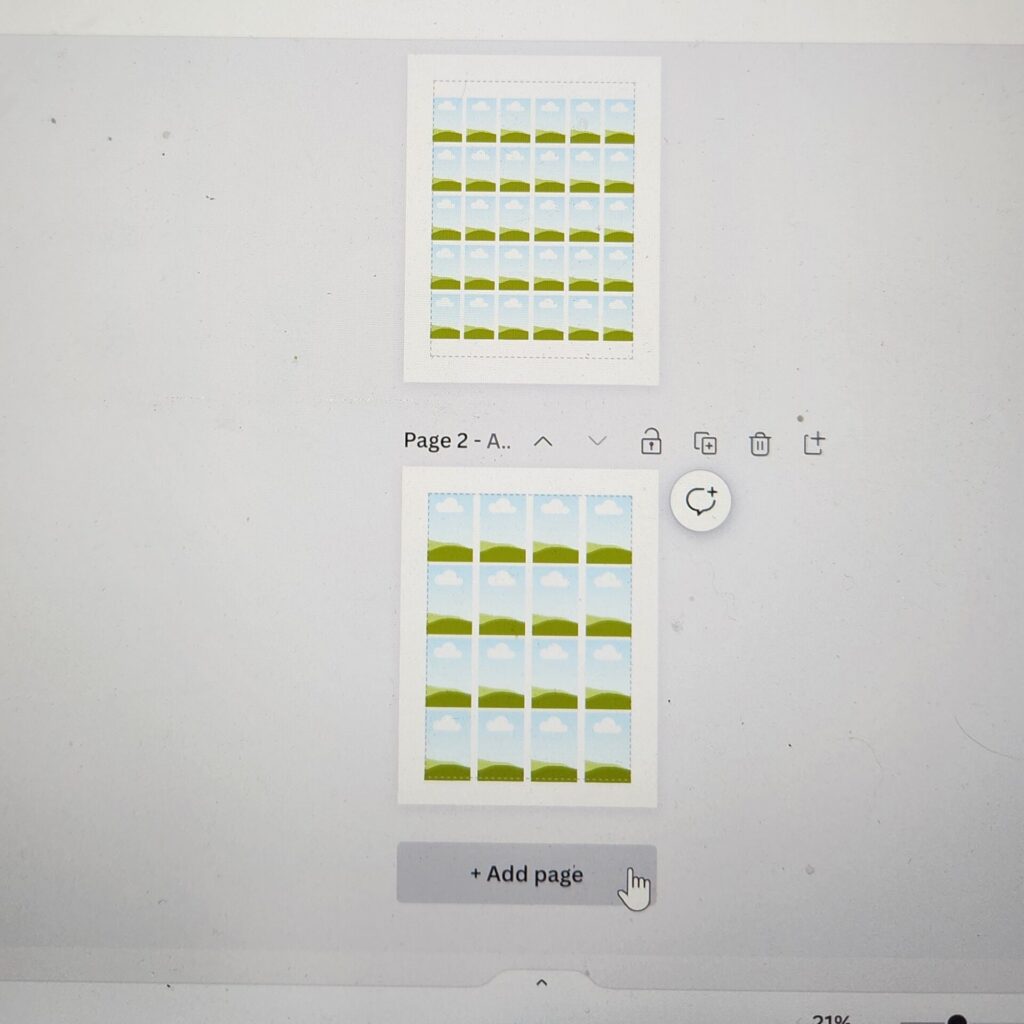
You can also duplicate the pages.
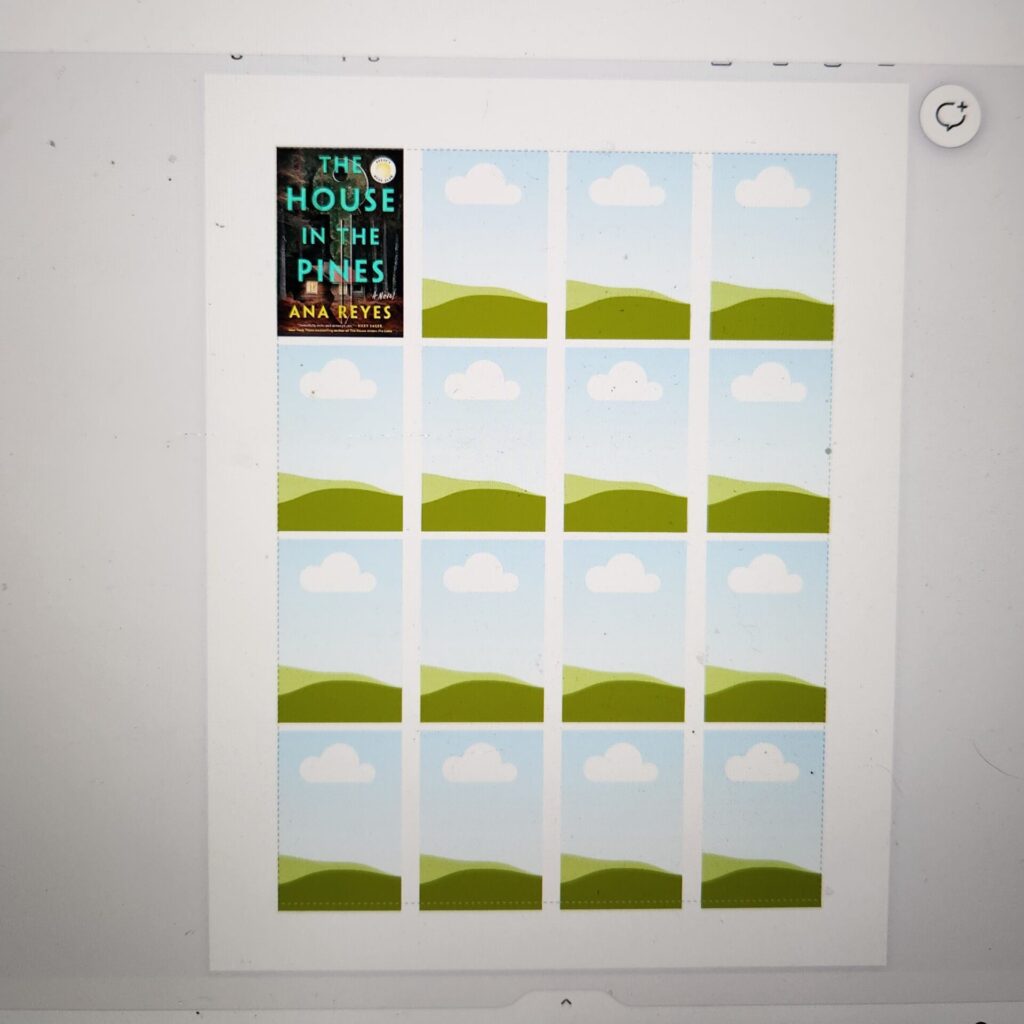
Step Six: Add Book Covers
Next, go to the “Uploads” tab again on the left side. You should see all the book covers there. Drag and drop one cover into each of the Grids.
Step Seven: Download PDF
Once you have all your book cover images ready to go, click on the “Share” button in the top right corner. Then click on “Download”.
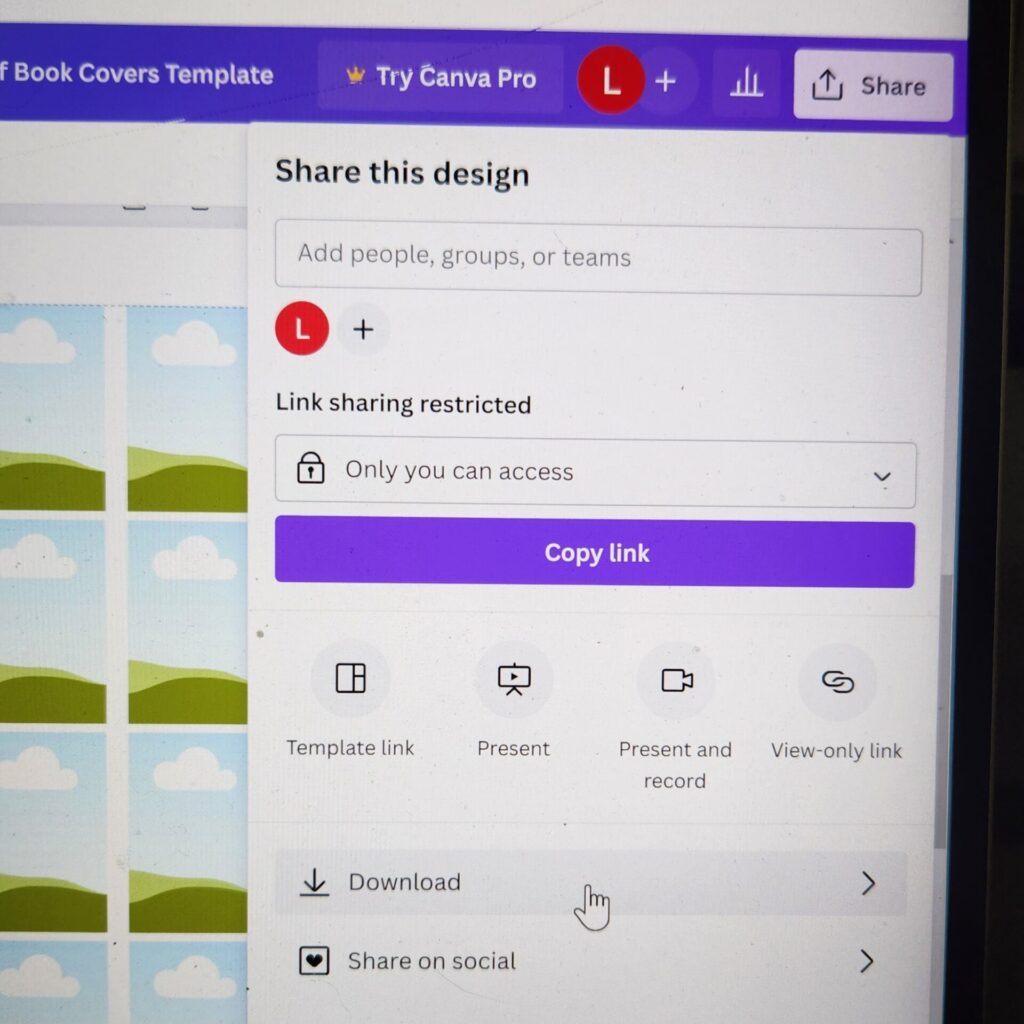
Change the “File type” to “PDF Print”.
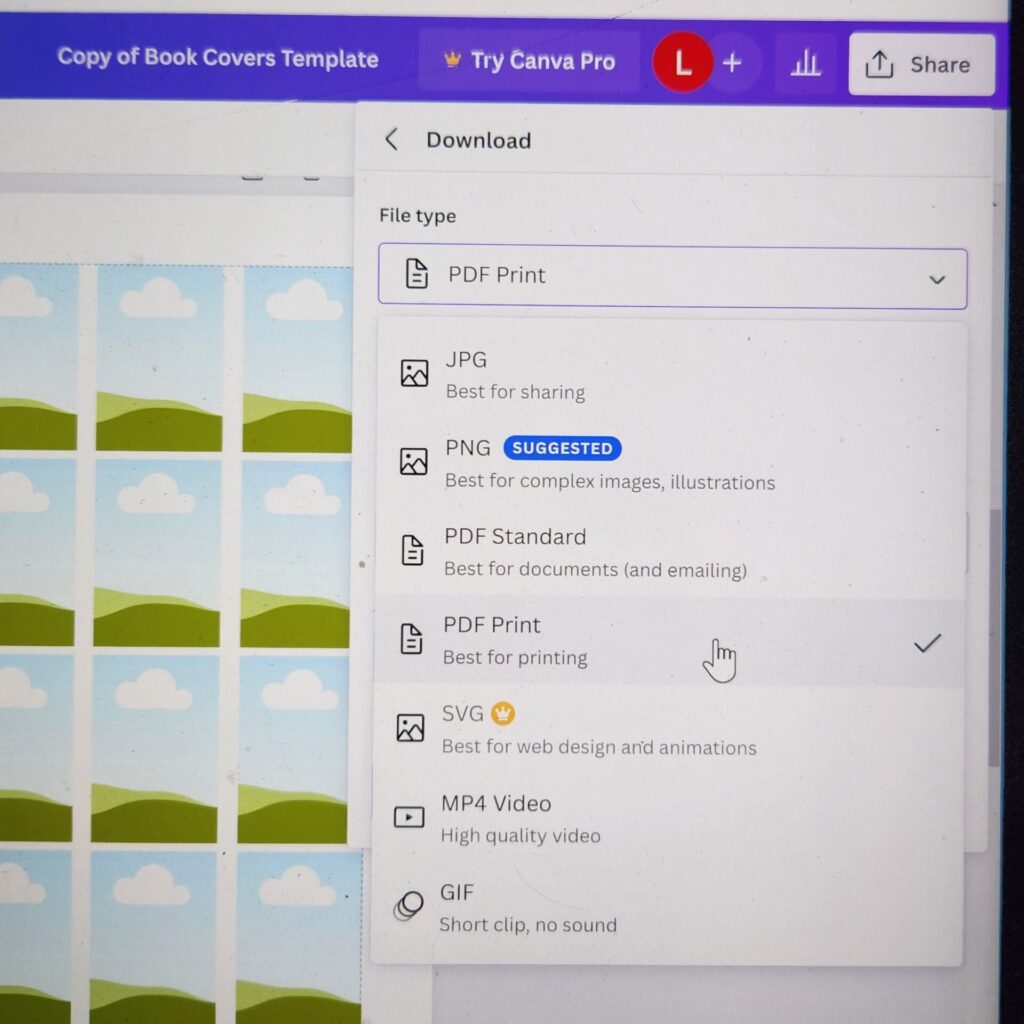
Then click “Download”.
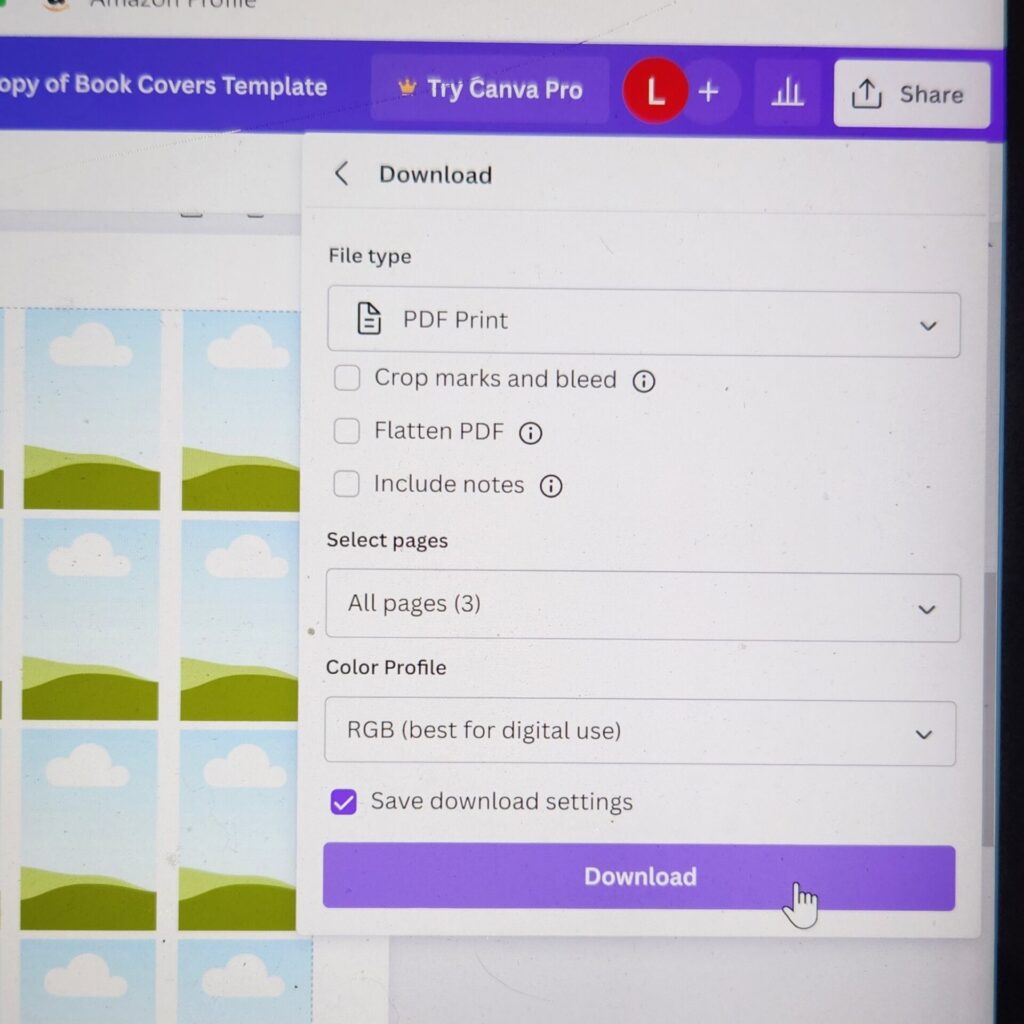
Now you can save the PDF of your book covers to your computer.
Step Eight: Print, Cut, & Add to Your Journal
You are ready to print!
I use my local library because I do not have a color printer, and they are inexpensive and high quality.
I usually cut the photos out using regular old scissors, but you could also use a paper trimmer if you want to be more precise.
Then you can add them into your journal.
I use a tape runner. I find this to be the easiest, fastest, and least messy option. Of course there are many ways to tape or paste them in, but I definitely recommend a tape runner. They are fairly inexpensive and can be found on Amazon or at most stores.
If you are using 5mm dot grid for your journal, these are the approximate size that the book covers will be once you’ve printed them out:
- 1 x 1.5 inch – 5 x 7 Squares
- 1.5 x 2 inch – 7 x 10 Squares
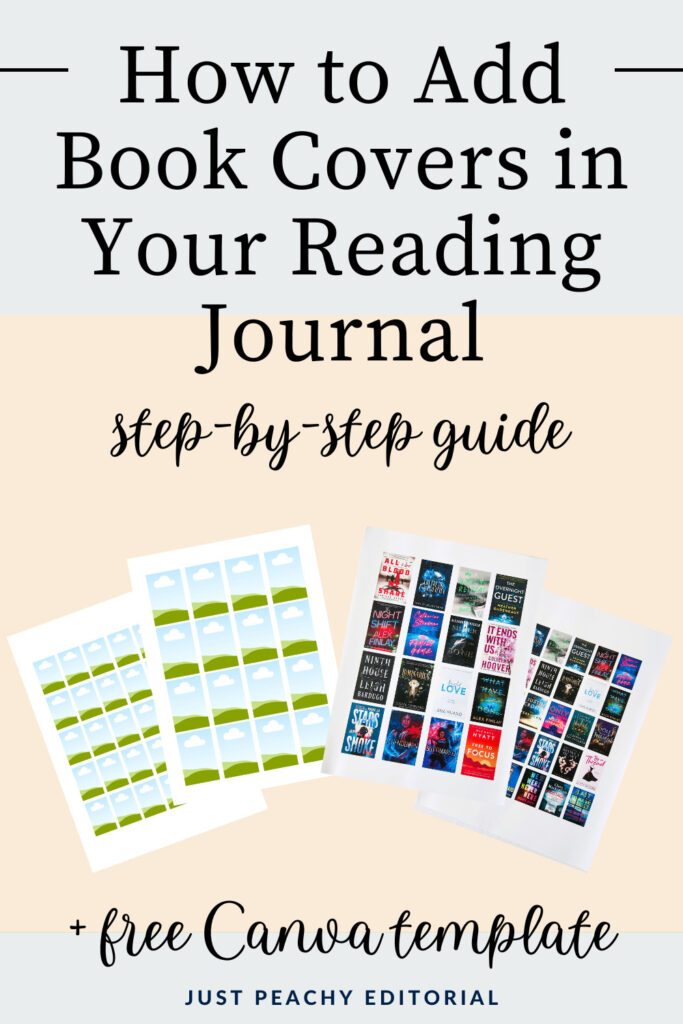
How to Use My Free Canva Template
I have created a pre-made Canva template for you!
I’ve done all the work upfront so all you’ll have to do is upload the book cover images, drag and drop them in, and then download and print. Super quick and easy.
Once you sign up and click the download link, you’ll be prompted to “Use Template” and it will automatically open up the template read for you to use.
You will need to have set up a Canva account first. See the Canva instructions above if you need more help with using Canva.
There are two full pages, one with the small size and one with the medium size.
Click here to get access to the free Canva template!


Leave a Reply